The article is devoted to the first acquaintance with the PC-Lint 8.0 static analyzer of C++ code. The process of the tool installation and its initial setting is described.
C++ language is one of the most powerful but at the same time one of the most difficult programming languages. Countless amount of literature is written about creating a high-quality code, using different methodologies of development and testing. But the problem of increasing the quality of developing code is still an actual sphere, which is not entirely studied.
Among the tools that help in testing and upgrading the program code it is possible to point out several classes.
The systems for automating unit-testing can be referred to the fist class. Such well-known program tools as AutomatedQA TestComplete (http://www.automatedqa.com) or Parasoft Jtest (http://www.parasoft.com/) can be given as examples. This testing methodology is applied in many companies with great success and is irreplaceable in case of working at a dynamically developing program product.
The other direction is reducing the costs of the software testing stage is identification of the changed software parts. This helps to considerably reduce the amount of manual testing and to point out the modified areas for a more careful checking. This approach supports high testing quality at less time expense. The representative of this tool class is Testing Relief.
During debugging of large applications the dynamic analyzers proved good. Valgrind (http://valgrind.org) and Compuware BoundsChecker (http://www.compuware.com) may be referred there.
A wide range of tasks of program code checking is solved by static analyzers of both general and specific. To the first, for example, can be referred the production of Coverity Incorporated company (http://www.coverity.com) or Gimpel Software PC-Lint (http://www.gimpel.com), which we will describe more carefully. To the specific static analyzers we can refer Viva64 tool (http://www.viva64.com ) aimed for detect 64-bit portability issues and errors.
In this article the first steps are considered of the studying static analyzer Gimpel Software PC-Lint 8.0 version. It is connected with its popularity among developers of software and their interest in using similar static analyzers. Using static code analyzers has become culture in many large companies long ago and the interest to such tools is constantly increasing.
At the first acquaintance of a beginning user with PC-lint some difficulties may arouse in understanding the principles of work of this program and its settings. Having accomplished the recommendations given in this article you can get down to the code analysis proper quicker and not waist time on studying the peculiarities of settings at the first stages of work.
This article on installing and setting PC-lint will be represented as a simple manual consisting of pictures which show different steps and an explanation text to them.

Picture 1. Run setup wizard.
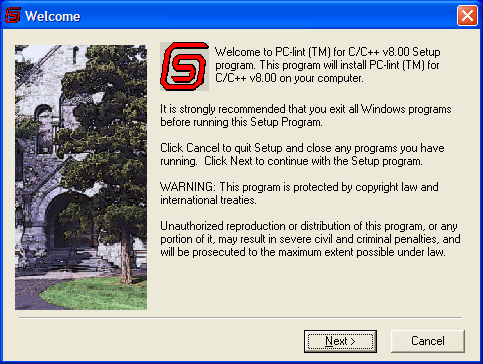
Picture 2. Look through the first pages of setup wizard.
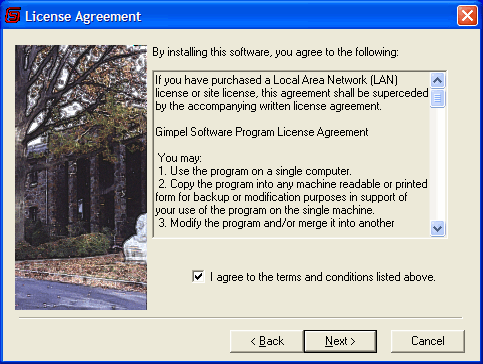
Picture 3. Agree with the license agreement.
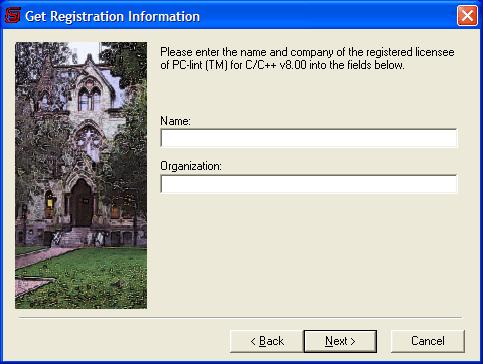
Picture 4. Input your name and the name of the organization.
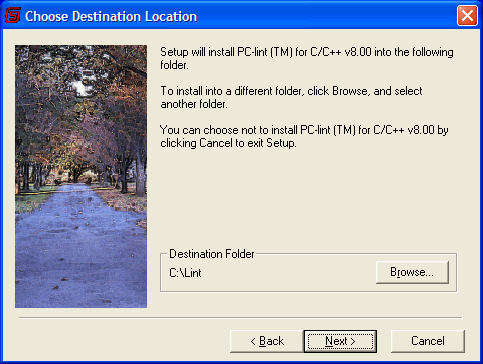
Picture 5. Choosing the directory for the installation. For you will have to work with the folder where PC-lint is installed quite often, we do not recommend you to install it in a directory that is more than one level from a root directory to correct the configuration file or read the documentation. On the other hand, after installing you will be able to configure necessary links to the files you are interested in, and then the file location is of no importance. We agree for the installation in the root catalogue of disc C.
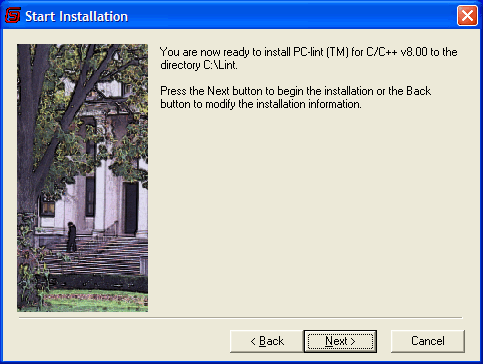
Picture 6. Continue the process of installation.
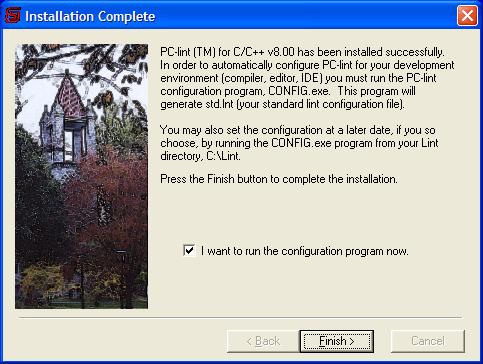
Picture 7. When the installation is finished, agree with the running of the configuration program.
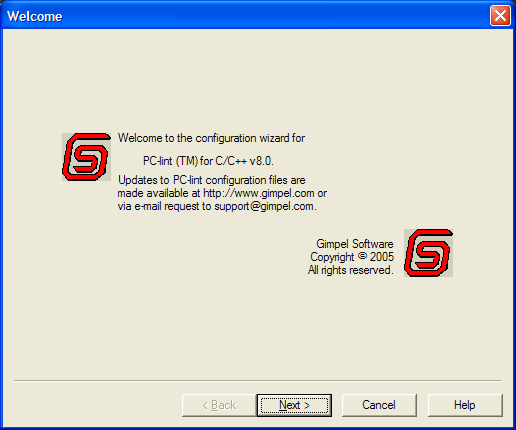
Picture 8. Now it's time to make coffee and get ready for the setting your new tool.
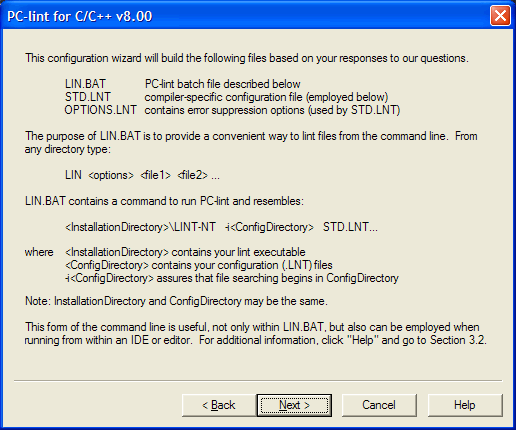
Picture 9. PC-lint makes it possible to use itself standalone in a batch mode. But in our opinion more convenient is its interactive using from Visual Studio sphere. The description of integration process of PC-lint into the sphere you can find in env-vc7.lnt file. This file contains information on integration into Visual Studio 2003, but the difference in the integration into Visual Studio 2005 is not much noticeable. You may not address this file but use our document, where all the necessary corrections concerning Visual Studio 2005 have already been done.
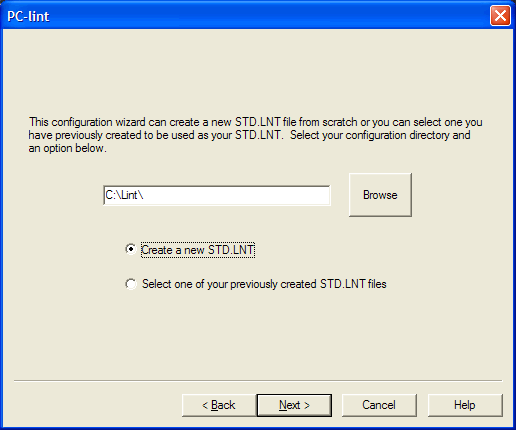
Picture 10. Choosing the location of the configuration file, which is going to be created by the wizard. We recommend to put it in the same place with PC-lint for all the files referring to this utility to be located in the same place. In the opposite case you will have to waste some more time on path settings to different files. You can also use the existing configuration file. Let us choose creating of new configuration file.
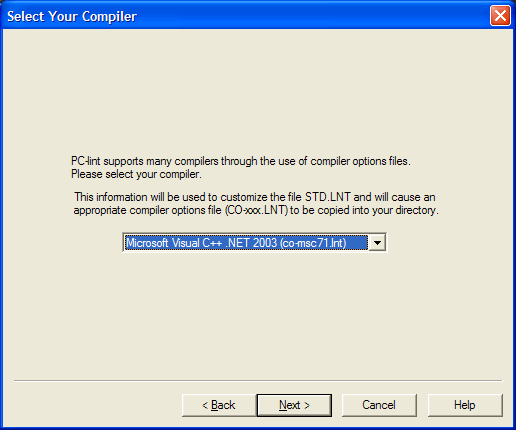
Picture 11. Choose a more appropriate configuration file for our compiler. Unfortunately, we will not find Visual C++ 2005 in the list, so we stop at Visual C++ 2003. Further on we will manually correct the configuration file "STD.LNT" generated by the setup wizard.
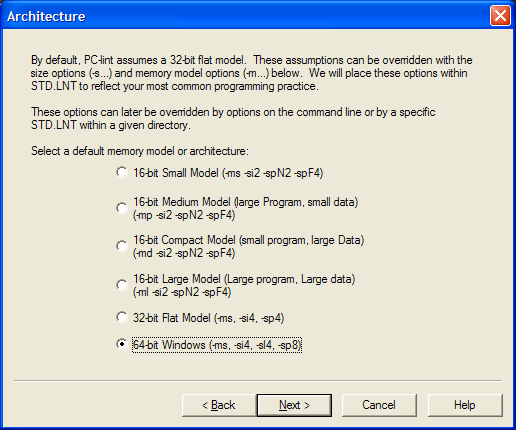
Picture 12. Choosing the database we are interested in.
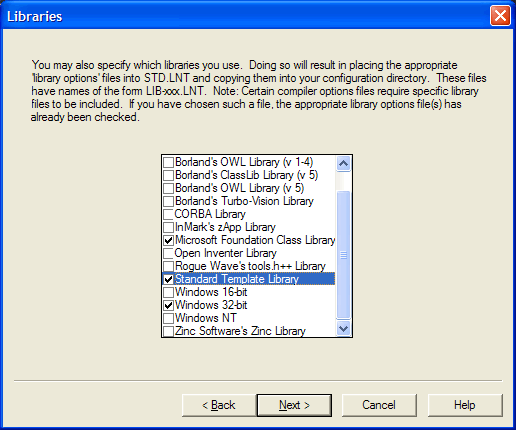
Picture 13. We will evidently need the support of MFC, STL and Win32API libraries, so we include the corresponding configuration files. This setting does a very important thing: it copies LNT files necessary for work from "C:\Lint\lnt" catalogue into "C:\Lint" catalogue. Otherwise you will have to do it manually. These files will not be found in "C:\Lint\lnt" catalogue even if you add this directory to the path environment.
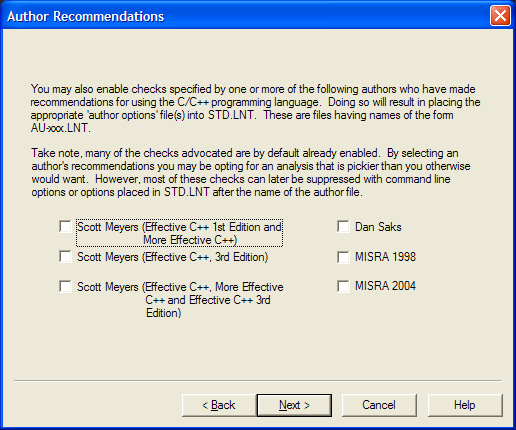
Picture 14. It is for you to decide what to choose from the list of different sets of rules of code verification. For now you may choose nothing, and then manually or with the help of the same wizard to add or remove different sets analyzing then the result of verification on your programs.
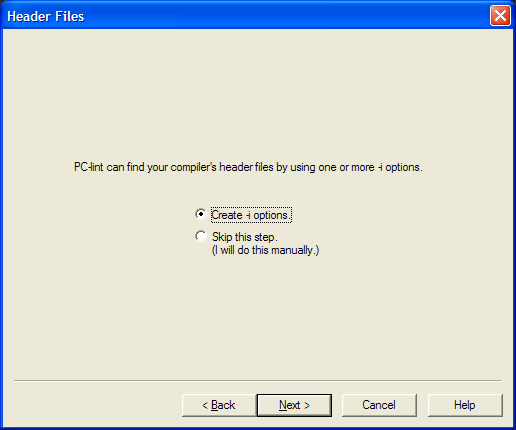
Picture 15. If you use in your program not only standard include files but also external libraries (for example, Mesa), then you will have to write the corresponding paths.
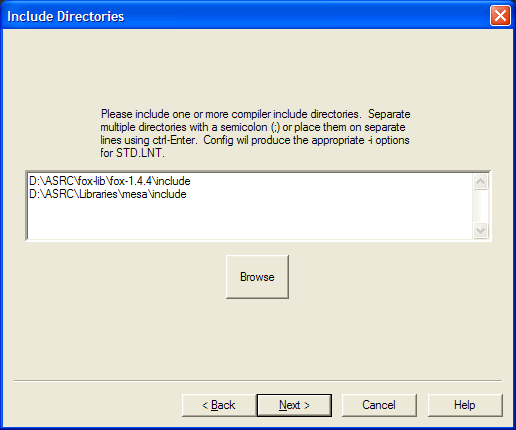
Picture 16. Writhe the paths to the necessary include files. It is strongly recommended to be done, otherwise PC-lint will simply stop at the lines #include "unknown.h".

Picture 17. That's it, the creating of the base configuration file is over.
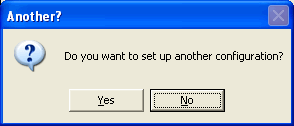
Picture 18. Now we can, using it as an example, make configuration files we need. We will not create other configurations, that's why we choose "No".
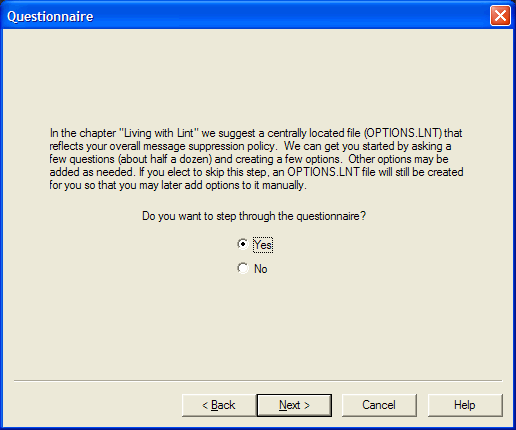
Picture 19. We can also execute some additional settings on PC-lint behavior. Now we will pass through this stage to demonstrate further on the connection between these settings with the "options.lnt" configuration file.
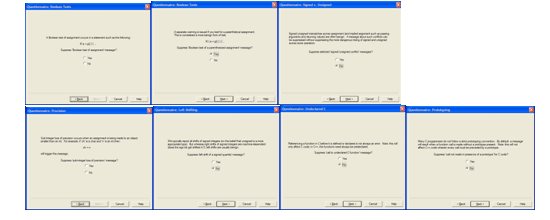
Picture 20. We will not describe further settings in detail. It will be up to you to decide what to consider to be a suspicious code and what not. But we would like to say that we decided not to consider the following construction suspicious:
if ( (a = b) ) {
   ...
}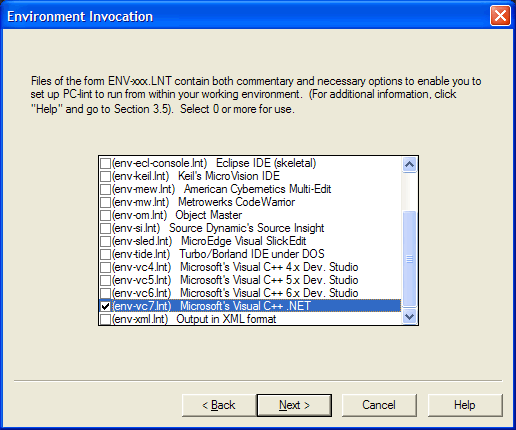
Picture 21. Choose more appropriate settings for our environment. Choosing "env-vc7.lnt" is not reflected on generated configuration files. The sense of this setting is not clear. A mistake possibly exists in the master of configuration. We will later add "env-vc7.lnt" into the configuration ourselves.
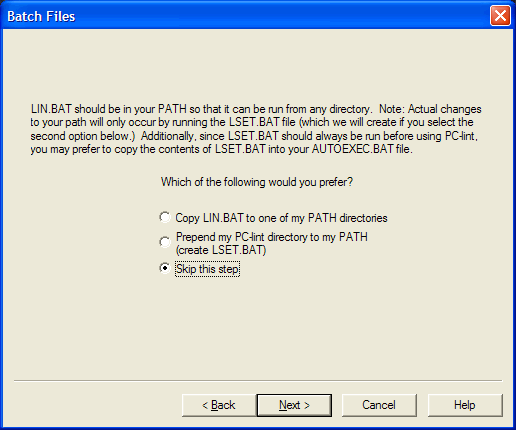
Picture 22. For we are not going to use PC-lint in a batch mode, we can skip this step of configuration.
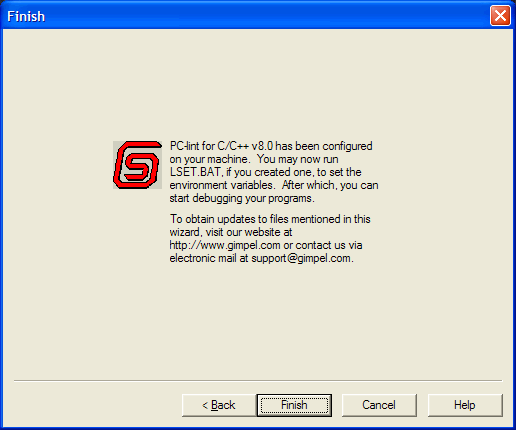
Picture 23. The installation of the utility is finished completely, now it is possible to get down to the final setting and integration into Visual Studio 2005.
In the beginning we need to go to the site http://www.gimpel.com and get new updates for PC-lint and new configuration files. As we use 8.00 version, we download the updates for it from the page http://www.gimpel.com/html/ptch80.htm.
If you do not have "co-msc80.lnt" file, then get it. It is represented as a configuration file for working in Visual Studio 2005. In any case it must be placed in the folder "C:\Lint" (see also picture 10).
You may also see other updates and do what you think is necessary.
Now we are ready to get down to completion of configuration files. First of all let us look at the files, which were generated during the installation of PC-lint utility. These are the files "options.lnt" and "std.lnt". Let us start with the file "options.lnt". It looks like the following:
// Please note -- this is a representative set of error suppression
// options. Please adjust to suit your own policies
// See manual (chapter LIVING WITH LINT)
// for further details.
-e820 // allow test of parenthesized assignment
In this file the wizard saved our wishes concerning the analysis of some situations (see picture 15). Do you remember we decided that the construction of the kind
if ( (a = b) ) {
   ...
}
correct? The result of this solution will be reflected in the file "options.lnt" as a line
-e820 // allow test of parenthesized assignment
which says to consider these constructions safe.
The file "options.lnt" is included in "std.lnt". The ideology of the including of one PC-lint configuration file into another is the same as the ideology of using the file "#include" in C/C++ languages.
Now let us have a look at the file "std.lnt"
// Microsoft Visual C++ .NET 2003,
// -si4 -sl4 -sp8, lib-mfc.lnt lib-stl.lnt lib-w32.lnt
// Standard lint options
co-msc71.lnt
lib-mfc.lnt lib-stl.lnt lib-w32.lnt
options.lnt -si4 -sl4 -sp8
-iD:\ASRC\fox-lib\fox-1.4.4\include
-iD:\ASRC\Libraries\mesa\include
The line "co-msc71.lnt" includes (like #include in C/C++) the setups for Visual C++ compiler in our main configuration file. Change this line into "co-msc80.lnt" at once.
The line "lib-mfc.lnt lib-stl.lnt lib-w32.lnt" can be left without changes.
Let us add "env-vc7.lnt". We do not have the file "env-vc8.lnt" but everything will work perfectly well with "env-vc7.lnt". It is suggested not to include "env-vc7.lnt" in your configuration files in the documentation to PC-lint but to use it as one of the parameters at the call from the MSVC environment. But to our mind it is more convenient that all the settings should stay at the same place. Anyway "std.lnt" is already oriented to the work in Visual Studio environment. And when, for example, "env-vc8.lnt" appears, it is easier to correct in one place (in "std.lnt") than to correct several commands in Visual Studio environment, which call PC-lint.
The line "options.lnt -si4 -sl4 -sp8" seems to be difficult, but in fact four simple and independent keys of setting are located in it. The first on includes "options.lnt" into the file "std.lnt". The rest serve to set sizing of data types. You should see the documentation, which is included in the PC-lint set, for the details.
The idea of using the included files is very convenient. It is possible to collect separately path settings to the headline files or to include/exclude a number of warnings. And then to build the final configuration files with them like with the bricks. We suppose that you will cope with it quite easily yourselves. Now let us get rid of the file "options.lnt" to make it simpler having transferred its contents in "std.lnt".
Let us add one more level of warnings to configurations, which is set with the key -w##.
After the corrections the file "std.lnt" looks the following way:
-iD:\ASRC\fox-lib\fox-1.4.4\include
-iD:\ASRC\Libraries\mesa\include
co-msc80.lnt
env-vc7.lnt
lib-mfc.lnt
lib-stl.lnt
lib-w32.lnt
-si4 -sl4 -sp8
-w3
-e820
It is quite a working variant of the configuration, and it's time to integrate PC-lint into MSVC environment.
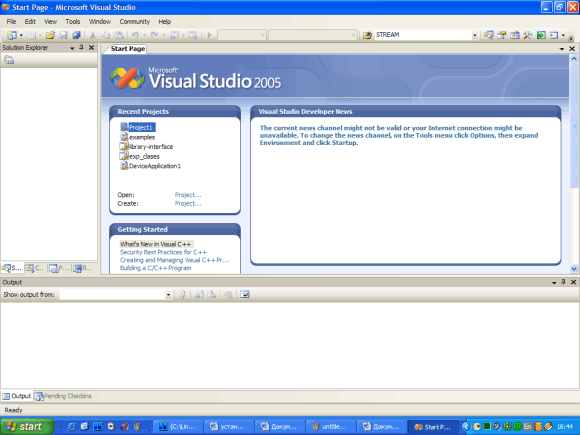
Picture 24. Let us start Visual Studio 2005 and get down to PC-lint integration. We are going to create tree new options in Tools menu:
Project Creation is the creation of PC-lint project for verification of all files in MSVC project;
Project Check the verification according to the earlier created project (verification of all the files);
Unit Check is the verification of the current file;
In the documentation to PC-lint using the operation called "Simple Check" for the verification of a separate unit of the compilation. But in practice one can rarely run across independent modules.
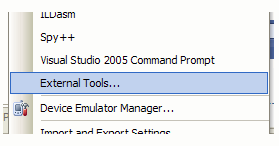
Picture 25. Choose the option "External Tools ..." in Tools menu.
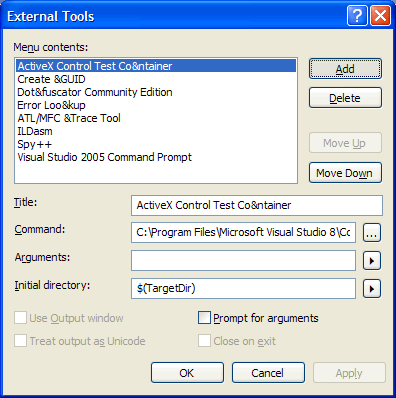
Picture 26. Push the button "Add".
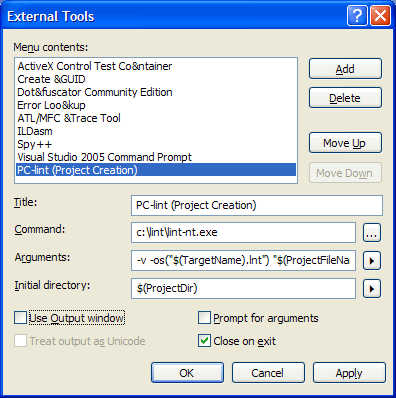
Picture 27. Let us fill in the corresponding fields like it is shown in the picture.
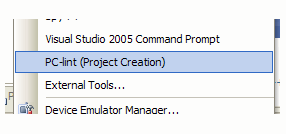
Picture28. Push the button OK. And now we can see the option "PC-lint (Project Creation)" in "Tools" menu.
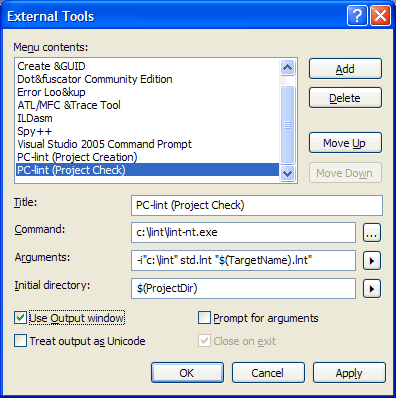
Picture 29. Now we are going to create the option "Project Check" like we did with the "Project Creation". We will have to repeat all the previous steps for it but we are going to fill in the fields in another way (pay attention to check boxes).
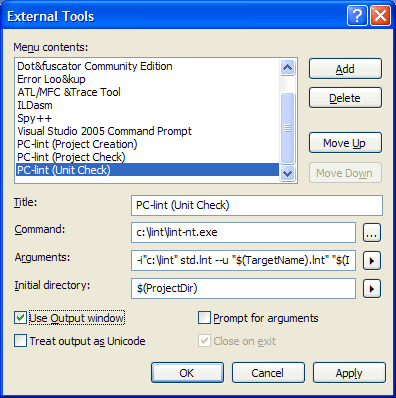
Picture 30. The last command is "Unit Check". All those steps are made to create it.
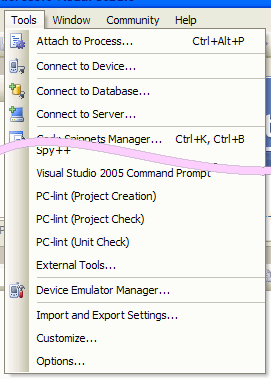
Picture 31. If you want to check if you hade done everything correctly, then in the "Tools" menu you can see three new options. Here the integration of PC-lint in Visual Studio is finished.
If you want to check all your project, you will have to use the option PC-lint (Project Creation) first and then PC-lint (Project Check).
You must use PC-lint (Project Creation) again when you add or delete files from the project or modify the settings of the project.
PC-lint (Unit Check) serves for the code verification in the active window. It is convenient while writing new code. Take into consideration that you will have to execute PC-lint (Project Creation) first to use PC-lint (Unit Check).

Picture 32. Now praise yourself with one more cup of coffee for the work done and we will assay this new utility.
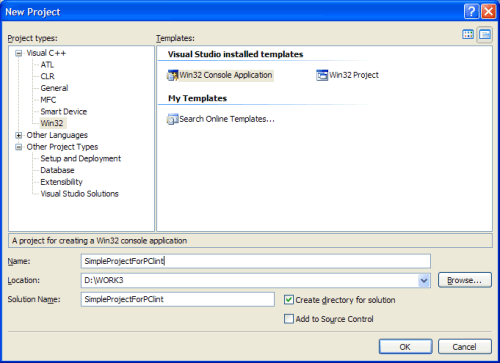
Picture 33. Create a simple Win32 console application.
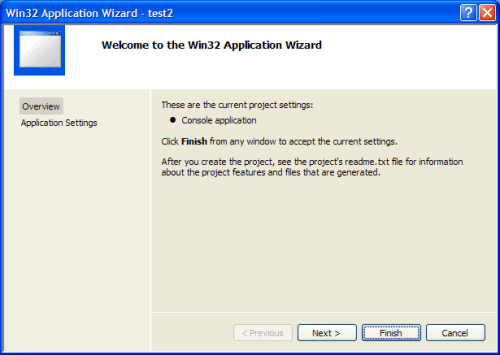
Picture 34. We need the simplest application, that's why we push the button "Finish".
Write the following program. Let us get assured that the program compiles, and the compiler does not give out warnings even at the fourth level (/W4).
#include "stdafx.h"
TCHAR FooTxt[] = _T("foo");
bool Foo(int argc, _TCHAR* argv[])
{
  for (int i = 0; i != argc; ++i) {
    if (_tcscmp(argv[i], FooTxt) == 0)
    {
      return true;
    }
  }
  return false;
}
int _tmain(int argc, _TCHAR* argv[])
{
  if (Foo(argc, argv))
    return 1;
  return 0;
}
No it's timeto use PC-lint. First we execute "PC-lint (Project Creation)", and then "PC-lint (Project Check)". If everything is set correctly, you must get approximately the following conclusion:
PC-lint for C/C++ (NT) Vers. 8.00u, Copyright Gimpel Software 1985-2006
--- Module: .\SimpleProjectForPClint.cpp (C++)
}
.\SimpleProjectForPClint.cpp(14): error 818: (Info -- Pointer parameter 'argv' (line 5) could be declared as pointing to const)
.\SimpleProjectForPClint.cpp(5): error 830: (Info -- Location cited in prior message)
--- Module: .\stdafx.cpp (C++)
--- Wrap-up for Module: .\stdafx.cpp
.\stdafx.cpp(9): error 766: (Info -- Header file 'D:\WORK3\SimpleProjectForPClint\SimpleProjectForPClint\stdafx.h' not used in module '.\stdafx.cpp')
--- Global Wrap-up
.\SimpleProjectForPClint.cpp(5): error 765: (Info -- external 'Foo(int, unsigned short **)' (line 5, file .\SimpleProjectForPClint.cpp) could be made static)
.\SimpleProjectForPClint.cpp(3): error 765: (Info -- external 'FooTxt' (line 3, file .\SimpleProjectForPClint.cpp) could be made static)
D:\WORK3\SimpleProjectForPClint\SimpleProjectForPClint\stdafx.h(9): error 755: (Info -- global macro 'WIN32_LEAN_AND_MEAN' (line 9, file D:\WORK3\SimpleProjectForPClint\SimpleProjectForPClint\stdafx.h) not referenced)
error 900: (Note -- Successful completion, 6 messages produced)
It's hard to disagree with. Now you have a wonderful tool in your arms, which will make it possible to you're your code better and to find both potential and present errors.
But if you get the message:
PC-lint for C/C++ (NT) Vers. 8.00u, Copyright Gimpel Software 1985-2006
--- Module: .\pclint.cpp (C++)
_
#include <stdio.h>
D:\Sources\pclint\stdafx.h(10) : Error 322: Unable to open include file
'stdio.h'
then it means that you have not set the environment settings and you will have to check the environment settings INCLUDE. Let us write in the command line
echo %INCLUDE%
As the result you must see:
C:\Program Files\Microsoft Visual Studio 8\VC\ATLMFC\INCLUDE;C:\Program Files\Microsoft Visual Studio 8\VC\INCLUDE;C:\Program Files\Microsoft Visual Studio 8\VC\PlatformSDK\include;C:\Program Files\Microsoft Visual Studio 8\SDK\v2.0\include;7
If the paths to the Visual Studio headline files are absent, then it is necessary to correct the environment settings or to write the paths to the files in PC-lint configuration files.
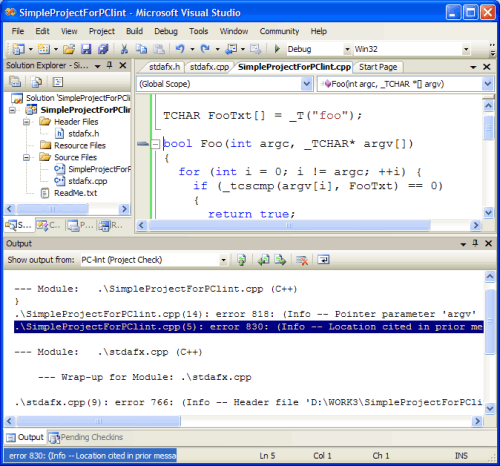
Picture 35. Pushing the button F4 in the window Output you can easily navigate among the warnings of PC-lint.
That's where the installation of PC-lint and its integration into Visual Studio 2005 can be considered finished. Your following step must be getting acquainted with the documentation and tuning of the configuration files to your specific needs. Good luck in your work!
0