
Our website uses cookies to enhance your browsing experience.

This article is written for all novice users of PVS-Studio static code analyzer in Visual Studio environment. It describes typical workflow of using the analyzer. Once you've covered the material in this article, you can easily get started with the analyzer, and then deepen your knowledge with the help of PVS-Studio documentation if needed.
Starting from the new PVS-Studio 6.00 version, developers can run the analyzer not only on C/C++ code, but on C# as well. Licensing policy remains the same - you buy/renew the PVS-Studio license, but now you can use PVS-Studio for 3 programming languages C/C++/C#
Usually, if the programmer runs a static code analyzer on the project for the first time, he has no idea what to do with that great deal bugs found by the analyzer. New project tasks are getting on his "to do" list, and there is no time to fix the issues that the analyzer detected. The developer wants to set the current warnings aside and start checking the newly written code fragments to get the analyzer's instant help. Another reasonable request for the analyzer is to have an ability to go back to the errors that were found in the "old" pieces of code. Let's see how this can be done using PVS-Studio on a C# project.
Let's have a look at the steps of work using Sharp Developer project as an example. We have already described the errors that the analyzer found in the scope of our previous article.
During the installation, PVS-Studio Analyzer integrates into the Visual Studio environment. Using the analyzer in Visual Studio is the easiest way to work with it.
If you are doing the analysis for the first time, we recommend running it on the entire project. Choose PVS-Studio>Check>Solution in the menu.
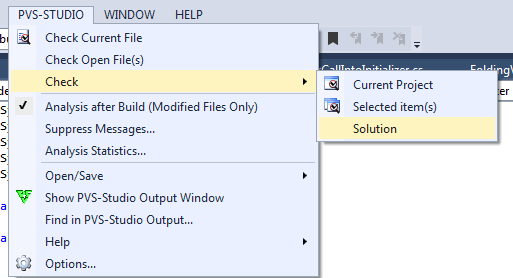
Figure 1. Checking the entire solution.
Within the frames of Sharp Developer project, the analyzer detected 20 warnings of high severity, 32 of medium severity and 182 low-severity warnings. By default, the programmer sees the warnings of high importance only. We recommend to start reviewing the code with high severity warnings and then move on to the warnings of low severity.

Figure 2. Error messages window (click on the image to enlarge).
If there is a situation when you have to start working on a new task and want to review all the warnings for your "old" code later, you may do the following:
1. Suppress current messages of the analyzer.
2. Set it up in such a way that it will do the analysis only for the new code.
If you want to suppress the warnings temporarily, select "Suppress Messages" in the menu.
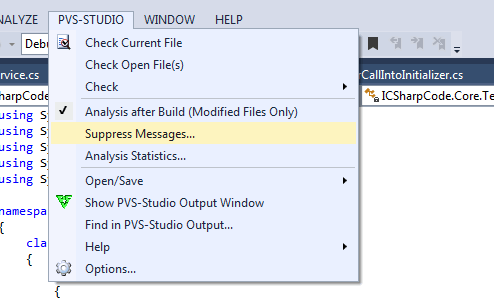
Figure 3. Mass marking of warnings as "uninteresting" for this period of time.
And then in the new window press "Suppress Current Messages".
All warnings from one project will be written in xml format and saved with the extension ".suppress" in the project folder. These warnings will not be displayed in the PVS-Studio window in Visual Studio, if you have not set it up.
The developer suppressed all the warnings, and he sees a window of PVS-Studio without any errors. The next step is to start getting the analyzer warnings only for new code.
By default, in order to see the new errors after the project build with the new code, we must restart the analyzer. But can be a redundant variant. A much more elegant solution is to use incremental analysis and check the new code with the help of PVS-Studio immediately after you have built the project. To do the incremental analysis choose "Analysis after Build" in the menu.
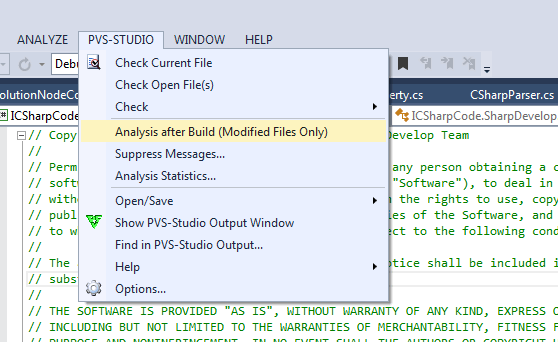
Figure 4. Enabling/disabling automatic file check after the compilation.
Let's see how it works. Suppose we wrote a simple class:
class TestAnalyzer
{
    public void Logging(DateTime dateTime)
    {
        System.IO.File.WriteAllText(
                        @"S:\path\to\file.log",
                        String.Format("Logging time: {1}h {2}m",
                        dateTime.Hour,
                        dateTime.Minute));
    }

    private void OnLoad()
    {
        Console.WriteLine("Event!");
        Logging(DateTime.Now);
    }

    private void OnClose()
    {
        Console.WriteLine("Event!");
        Logging(DateTime.Now);
    }
}
We compiled it and the analyzer issued two warnings.
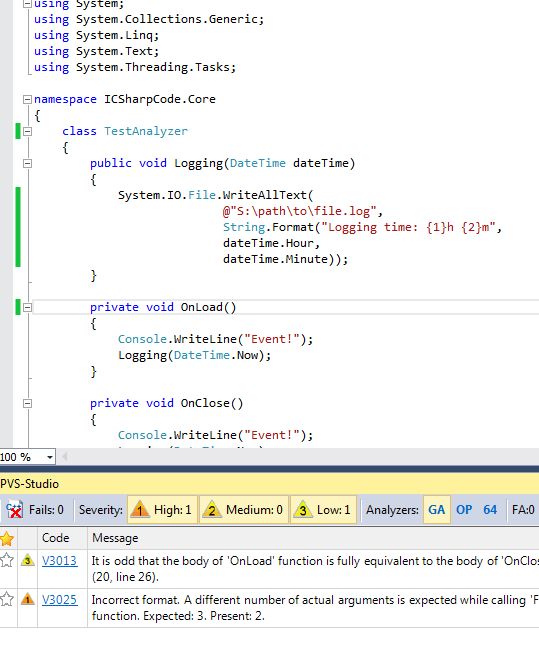
Figure 5. An example of incremental analysis.
Let's see how you can work with these warnings.
A real bug
Warning V3025 detected a real bug. Let's see what's there. The developer tries to address the dateTime.Minute parameter, using index 2, but the argument numeration is different. dateTime.Hour - index 0, dateTime.Minute- index 1, that's why indexes 0 and 1 must be used when addressing the parameters. Let's fix it by replacing:
System.IO.File.WriteAllText(
                @"S:\path\to\file.log",
                String.Format("Logging time: {1}h {2}m",
                dateTime.Hour,
                dateTime.Minute));
with the string:
System.IO.File.WriteAllText(
                @"S:\path\to\file.log",
                String.Format("Logging time: {0}h {1}m",
                dateTime.Hour,
                dateTime.Minute));
A false positive
In the second case the analyzer judges the code too critically and thinks that there can not be the same logic in the event handler OnLoad and OnClose. We understand that in our case it is normal, and decide that this is a false positive. To mark the warning as a false positive just click on it with the right mouse button and choose "Mark selected messages as False Alarms"

Figure 6. Suppression of a warning by adding a special commentary to the code.
After it the analyzer will add a commentary "//-V3013" to the string, for which the warning was issued. It will no longer issue a V3013 warning for this code string. More details about the false positives and handling them: "Suppression of false alarms"
It should be noted that in the analyzer we use an advanced algorithm of new code detection. If you don't create a new class, but change something in the old code, the analyzer will see a necessity to recheck such a file. More about this can be found in the documentation.
So the developer finally has some time to work on the warnings issued for the old code. It's really simple to review "old" warnings. Choose "Suppress Messages" in the menu, and then choose the project that you want to work on. We have ICSSharpCode.SharpDevelop as an example.
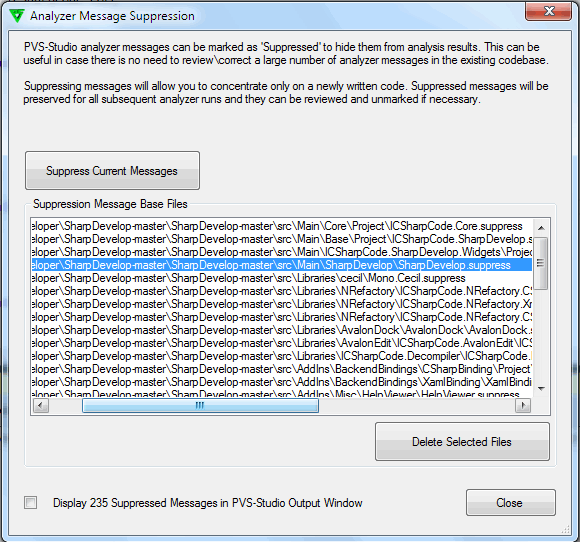
Figure 7. Removing a project from the list.
Then click "Delete Selected Files". NameOfTheProject.suppress file will be physically deleted from the project folder and the analyzer will no longer hide the warnings found in the project. To see the warnings, run the analyzer for the project, where you cancelled the warning suppression.
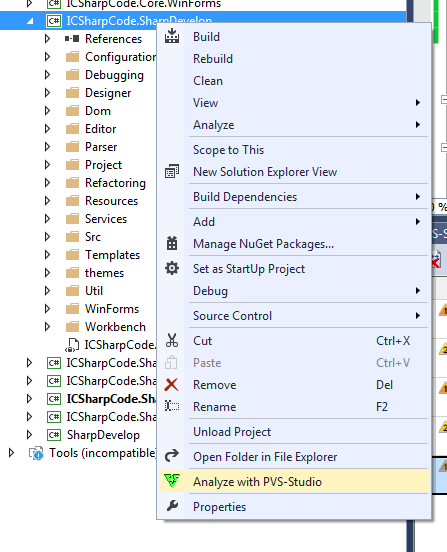
Figure 8. Checking a single project.
After running the analyzer on the current project you'll see the warnings, so you can start working on them.
The article describes the work with the analyzer from the point of a view of a single developer. We recommend following these steps. Another tip is to run the analyzer on the source code on the server. A developer can skip the analyzer's message or forget to work on it. You can read more about this in the documentation in the article:
We hope we managed to answer some questions about using the analyzer. If you still have any, please contact us support@viva64.com, we will be glad to help.
0
0
0

0